Removing Ads For Your Network with PiHole
In the last few guides, we have gone over how to set up a new headless Raspberry Pi with some sensible configurations, how to connect over SSH without using a password while ensuring only expected machines can connect, as well as how to use multi-factor authentication over SSH to add another layer of protection to our server. While these have all been good practices, we have not yet (at this point) actually used our Raspberry Pi for anything. Depending on where you've installed it your RasPi might be a fun conversational piece, but it would be a lot better if we could have it be working for us. Today, we'll be accomplishing that by adding PiHole to our Raspberry Pi as a DNS server, which will allow our entire network to benefit from their DNS-based ad-blocking.
First, let's go over some key concepts of the tech we're going to be using.
What Is a DHCP Server?
Very briefly, a DHCP server is a bit of software that is able to make all the devices on a network play nicely together by giving each of them a unique identifier (their IP Address), letting them know what DNS server to use, and trying to ensure that no two machines on the network have the same address. DHCP servers remove the need for each machine to be manually configured by someone who knows the network landscape, and instead offloads that task to a computer.
While most residential DHCP servers work entirely by dynamically allocating addresses to machines, they are also capable of providing reservations, which is when the DHCP server reserves an IP address for a specific machine. This is incredibly useful when you need to have a machine on your network that should always be given the same address because it needs to be predictably discovered by other machines. We see this often for network printers, servers, and other similar software.
What Is a DNS Server?
Whenever you click on a link or type a website's URL onto your browser's address bar there is a lot going on under the hood to bring you your content. While using the internet these days is pretty trivial, there are many systems in place that translate the experience from something that is easy for people to use (with words and text) to something that is easy for computers to operate on (broadly speaking, numbers). One of those systems is the Domain Name Service, which lets us convert URLs – such as natalia.dev – into IP addresses – such as 162.241.253.207.
Whenever you go to a website, your computer first makes a request to the DNS server that it is told to use by the DHCP server with the URL of the website. The DNS server then resolves the URL into an IP address, which your computer can then use as the destination on the packet that it sends.
One simple way of thinking about it is that the DNS server is similar to an address book that can tell you your friend's postal code. You consult it before you send a letter to your friend so that you can give the proper information to the post office, which will then send your letter.
What Is PiHole?
At its core, PiHole is akin to a DNS server. You configure it to receive DNS requests on your network, and it will take them in and resolve them. However, it has a crucial additional feature: It contains a comprehensive blocklist that allows it to determine if it should resolve it properly, or drop the request. This, in turn, allows it to drop all DNS calls to places that are known for serving ads, malicious content, trackers, and the like.
You might be thinking to yourself, "the internet is mostly free right now, isn't that powered by ads? Wouldn't it be a bad thing to block them?", and on some points you would be right. It is indeed true that much of the internet is able to sustain itself by ad-based revenue. However, this comes at a fairly substantial costs to users in that it exposes additional threats. There have been many recorded incidents of using ads to spread malware, and large companies that focus on generating ad revenue rely on using your data to generate comprehensive profiles on you to target you specifically for certain kinds of ads. There are several ethical and security implications to this that warrant a full discussion on another day.
For today, however, we will be going through a way that we can try to minimize this as much as possible through PiHole.
Setting Up Your Network
The first thing we should do is to make sure that we have a DHCP reservation for our Raspberry Pi up now. I usually like to get this step out of the way first, because I don't want to forget it.
Modern routers usually include a small HTTP server that allows you to manage it via a web interface, so we'll need to go on that to set up our DHCP reservation. My network's router is at address 192.168.0.1, so I can just punch that into my address bar to get the admin panel. Yours might be different, and you can consult this article by Lifewire on how to find yours.
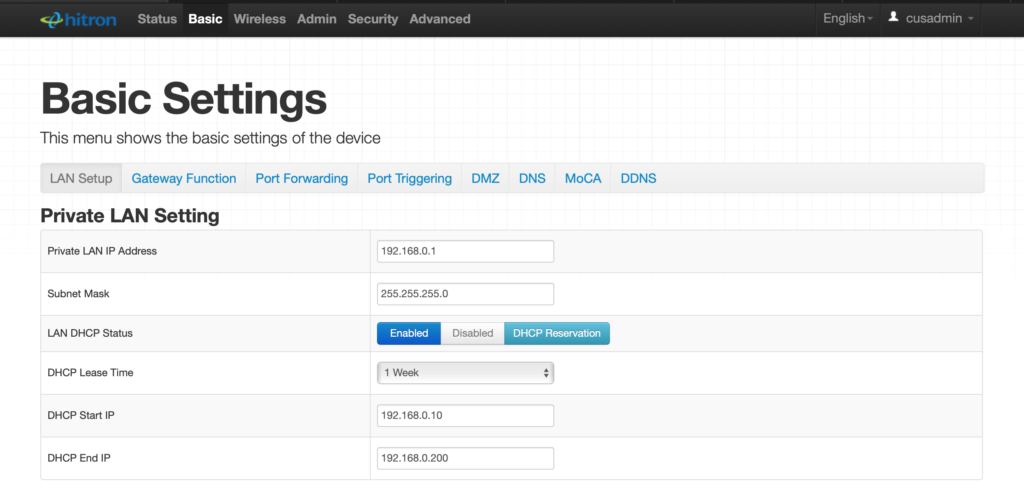
Once you have that address, go to it and log in. If you have never logged in before, you might need to look up your router's default admin credentials are. I highly recommend changing the password if it is still the default one.
After logging in, search for the DHCP settings. This might be under a different name, such as my own router which has it under "LAN Setup". Find the setting for "DHCP Reservation", and make one for your Raspberry Pi to maintain the same IP address.

Once you have this reservation complete, save your configurations and close out of the admin panel. Now we're ready to start setting up our pihole.
Installing PiHole
It is broadly recommended that we always look at code we're downloading from the internet before we run it on our systems. So first, let's download the basic installer code with the following command:
wget -O basic-install.sh https://install.pi-hole.net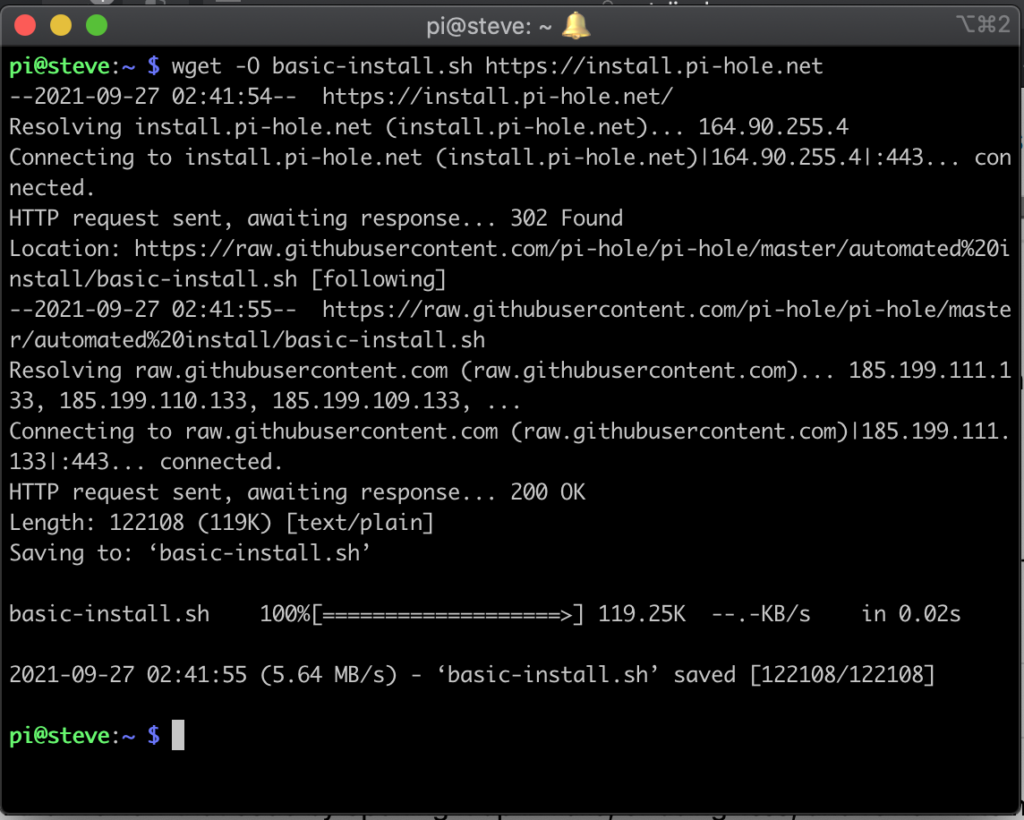
We can then review that code by opening it up in nano, or using less, and review it to make sure it doesn't seem to be doing anything wrong. Once we've finished with that process, we can run the script with the following command:
sudo bash basic-install.shThis will start a series of checks and package installations. You will then have to go through some menus, and select which interface to use. Since I am using my Raspberry Pi connected to ethernet, I chose the eth0 interface instead of the wlan0. If your interface names don't quite match, a good rule of thumb is that if it starts with eth it is most likely ethernet. If you're unsure, press 'Cancel' and figure out which interface you need to use.
Eventually, you will be prompted with a screen notifying you that PiHole needs a static IP, and then finally a selection screen for what upstream DNS provider you would like to use.
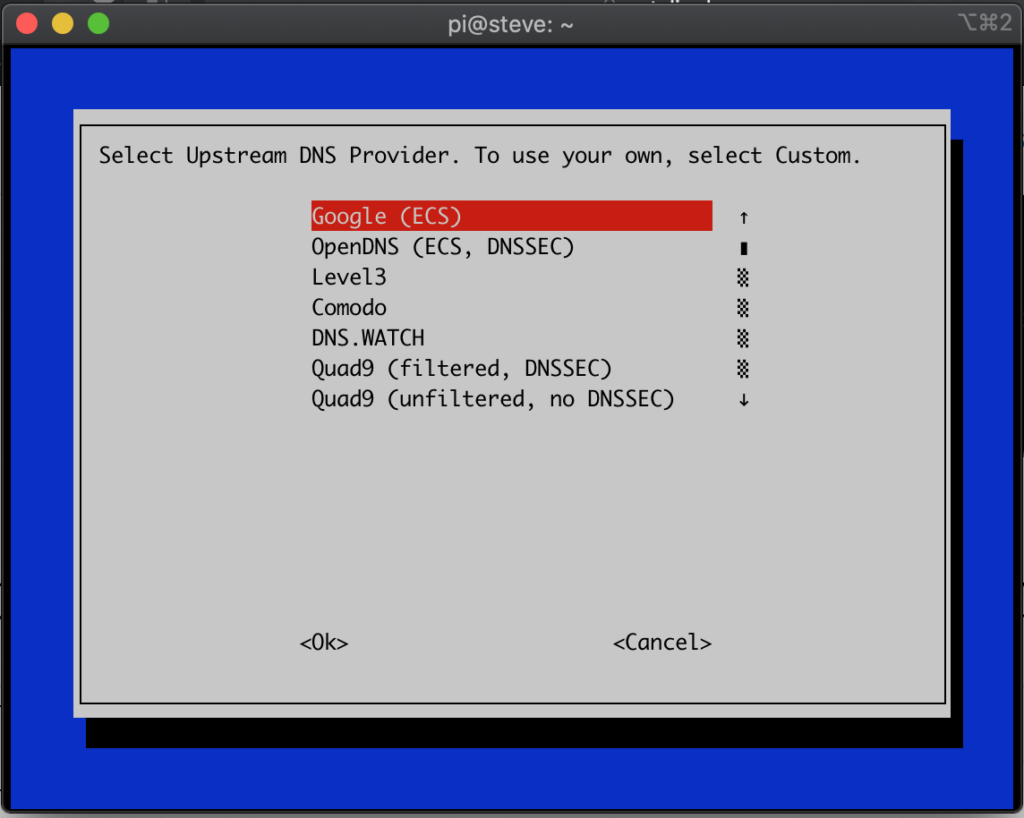
Which server you pick ends up being a matter of personal preference, and there's quite a few available. Personally, I like to go with OpenDNS, which I believe is currently owned by CISCO, since they support DNSSEC and are broadly a security-minded company. You can choose whichever one you find most appropriate based on your own criteria.
Afterwards, press Enter to accept, and leave the remainder of the settings as default until you reach the menu shown below:
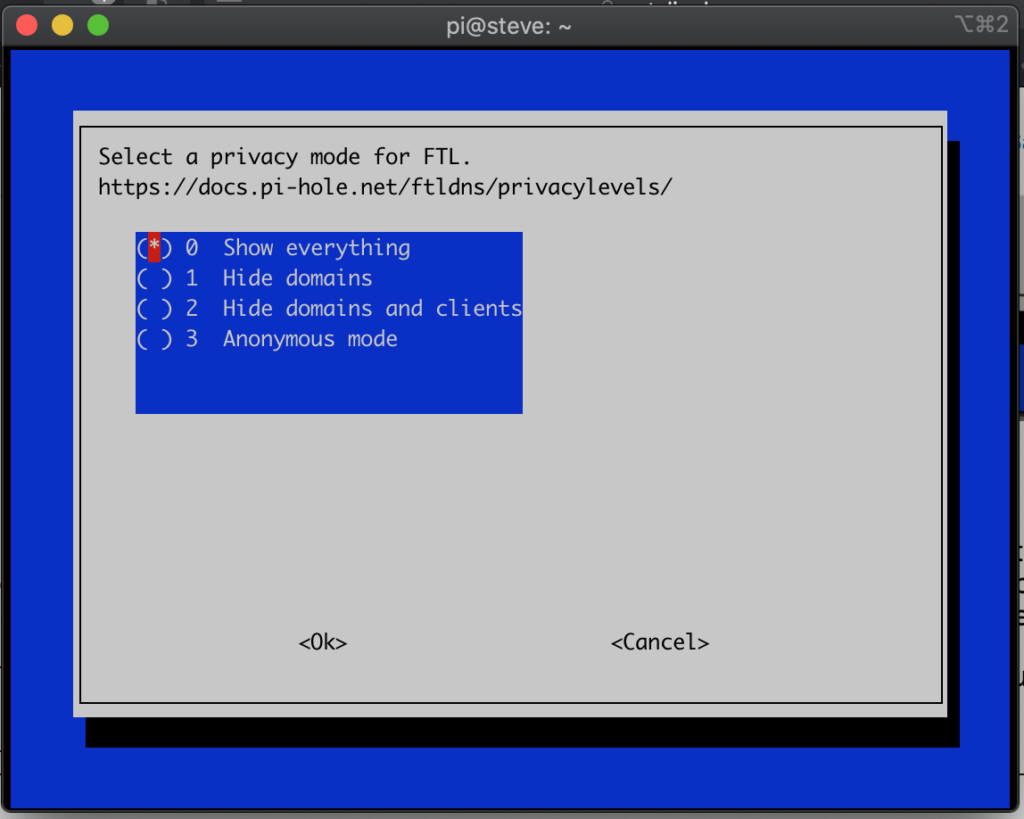
You can read a little bit more about what each privacy mode is on this link. I recommend you pick the one most appropriate for your home use. I won't touch too much on the ethics of logging information of the devices of your home, but I would like to take a minute to at least recommend that if you live with other people, you should check in with them before storing their data. It might be more appropriate to hide some or all of the information that is logged.
Once you have made your selection, the installer will continue setting up the config files and packages you need to run the software. Once you have completed the installation, it's time that we set up our DNS servers to point to our new PiHole!
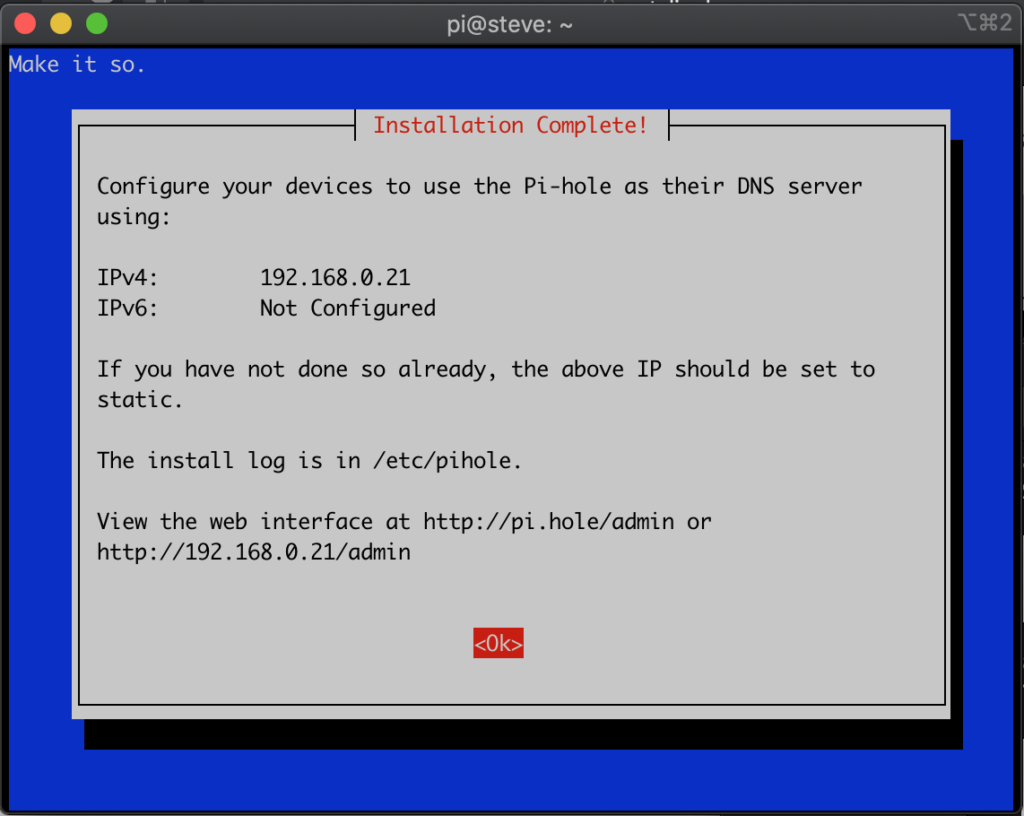
Enter on the <Ok> button will show you your terminal, which includes the default admin password.Setting up DNS Server Locally
I'm a very big proponent of the idea that we should fail fast, fail often, and fail small. As such, before we set all of our devices to use our new PiHole, we should first make sure that it is actually working appropriately.
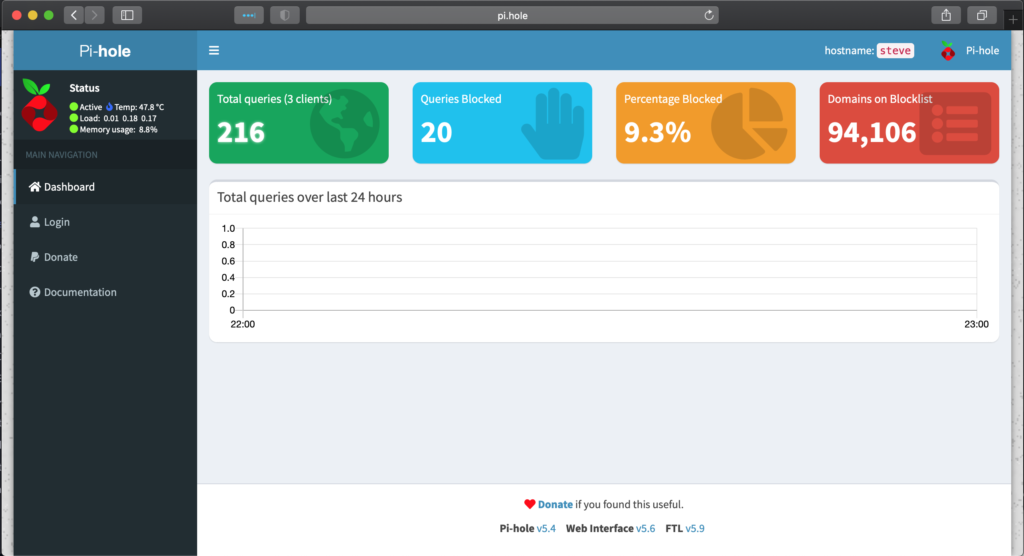
You'll need to change your DNS settings to point to the new PiHole. Once that is done, try navigating to the admin panel at http://pi.hole/admin. If you see the PiHole dashboard, your installation should be working! Try navigating to a few sites, such as your email or a local news site, to confirm that everything still works appropriately.
Setting up PiHole as Default DNS Server
Once we have confirmation that our PiHole works, it's time to make sure that our router sets the PiHole as the default DNS server for the entire network. Log back in to your admin panel, and search for the DNS settings of your router. Search for your DNS settings, and set the default server to be your PiHole's address
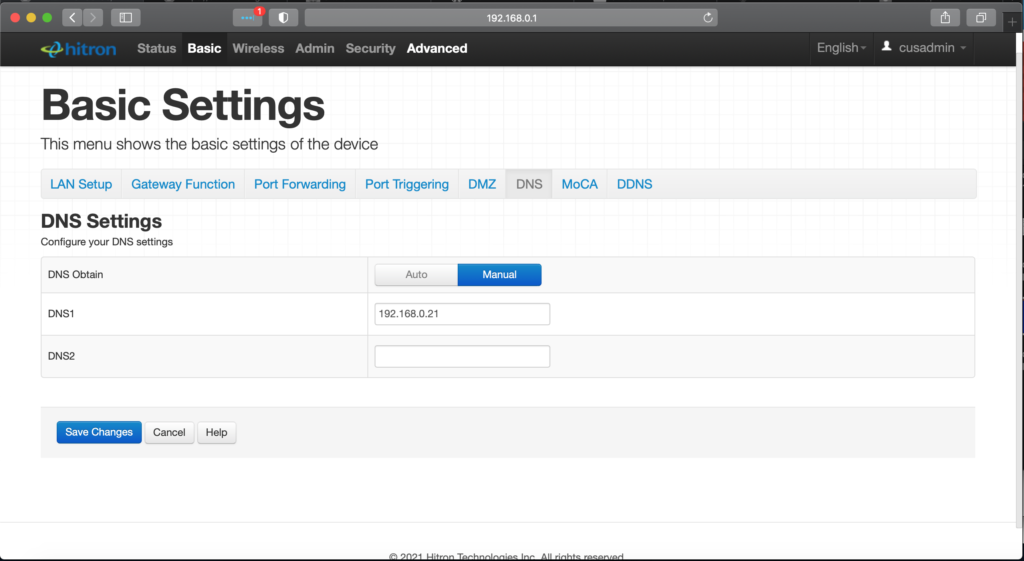
Once that is done, save your settings. If you are patient, now you can simply wait and whenever new devices connect (or old devices have their lease expire), you should have the PiHole be their DNS server. If you are like me and want to see the fruits of my labour kick in instantly, just restart your router. All devices will have to reacquire their lease, which will update the DNS setting for all devices immediately.
Using the PiHole as a DHCP Server
If you log in to the Admin Panel on the PiHole, you may have noticed that the clients are (at least for the most part) only shown by their IP address. This means that if an IP address changes, the logs cannot be properly attributed to a specific client, and the clients are not meaningfully described.
As well, some routers, especially the ones that are provided by Internet Service Providers (ISPs), don't actually allow you to change your default DNS server. If that is the case, you won't actually be able to use PiHole automatically without other changes.
In all of these cases, it might be wiser to use the PiHole itself as the DHCP server for your network.
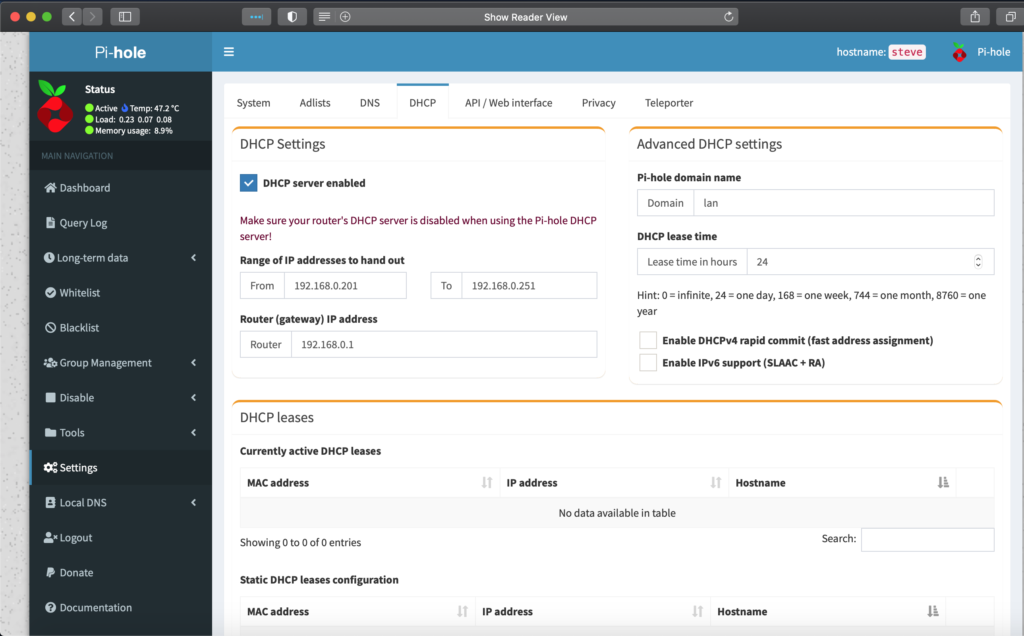
To start, go on your PiHole admin panel, navigate to Settings and DHCP settings. Click the checkbox to enable using the Pi as a DHCP server, and set the IP address range to appropriate values. Then, press "Save", and go to your router's admin panel and disable the DHCP functionality on the router. Then, restart your router to force all devices to renew their leases and they should all start using the Raspberry Pi as a DHCP server instead of the router.
Wrapping Up
In this guide we have gone over the following concepts:
- What is a DHCP server
- What is a DNS server
- How does PiHole work
- How to install PiHole on a Raspberry Pi
- How to configure a DHCP reservation
- How to enable using the PiHole as a DNS server for all devices in the network
Enjoy Reading This Article?
Here are some more articles you might like to read next: